I make a lot of sour beers. Sours occupy a large portion of my regular homebrew repertoire, because they have been rated so very well by all my sour loving friends. My homebrew suppliers, Hamilton Hops have asked me my tricks, and requested a how-to. Well here it is. Below you'll find a summary of my techniques, a walk-through with a few critical things to avoid, and then finally an extremely simply recipe which a number of drinkers have rated as the best beer they've ever had. The beers are way too good given how easy the technique is.
The Summary
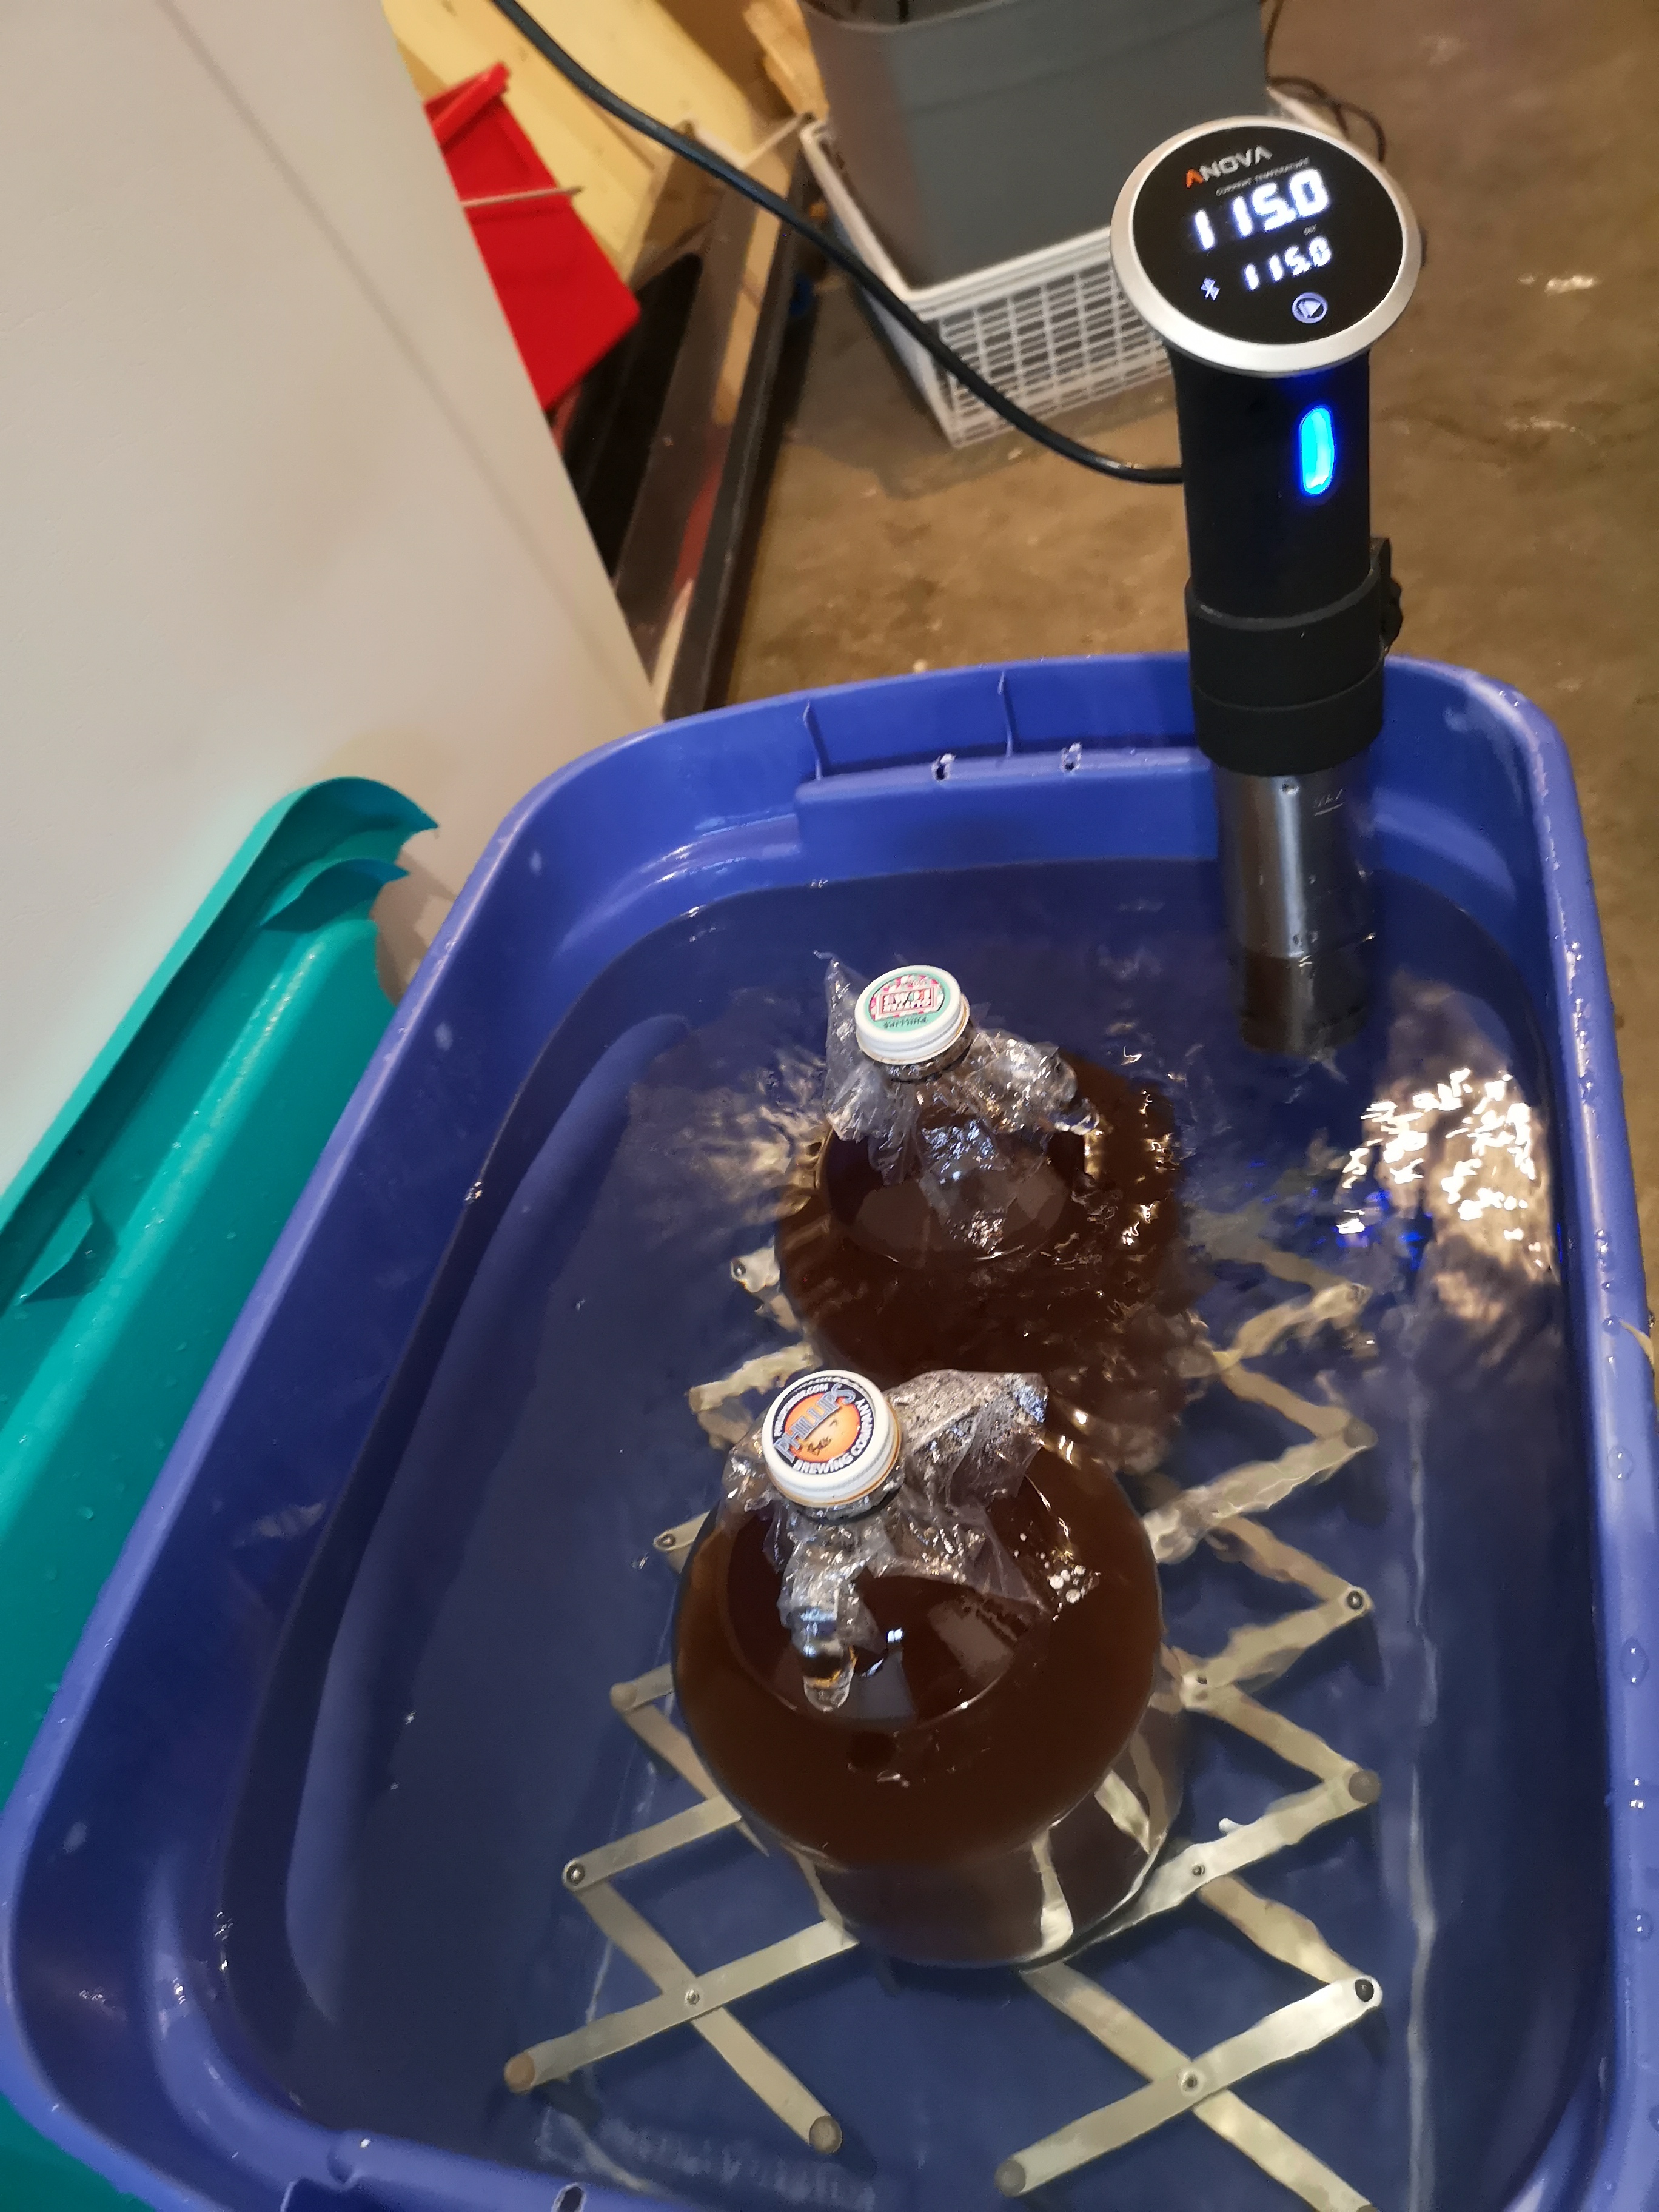
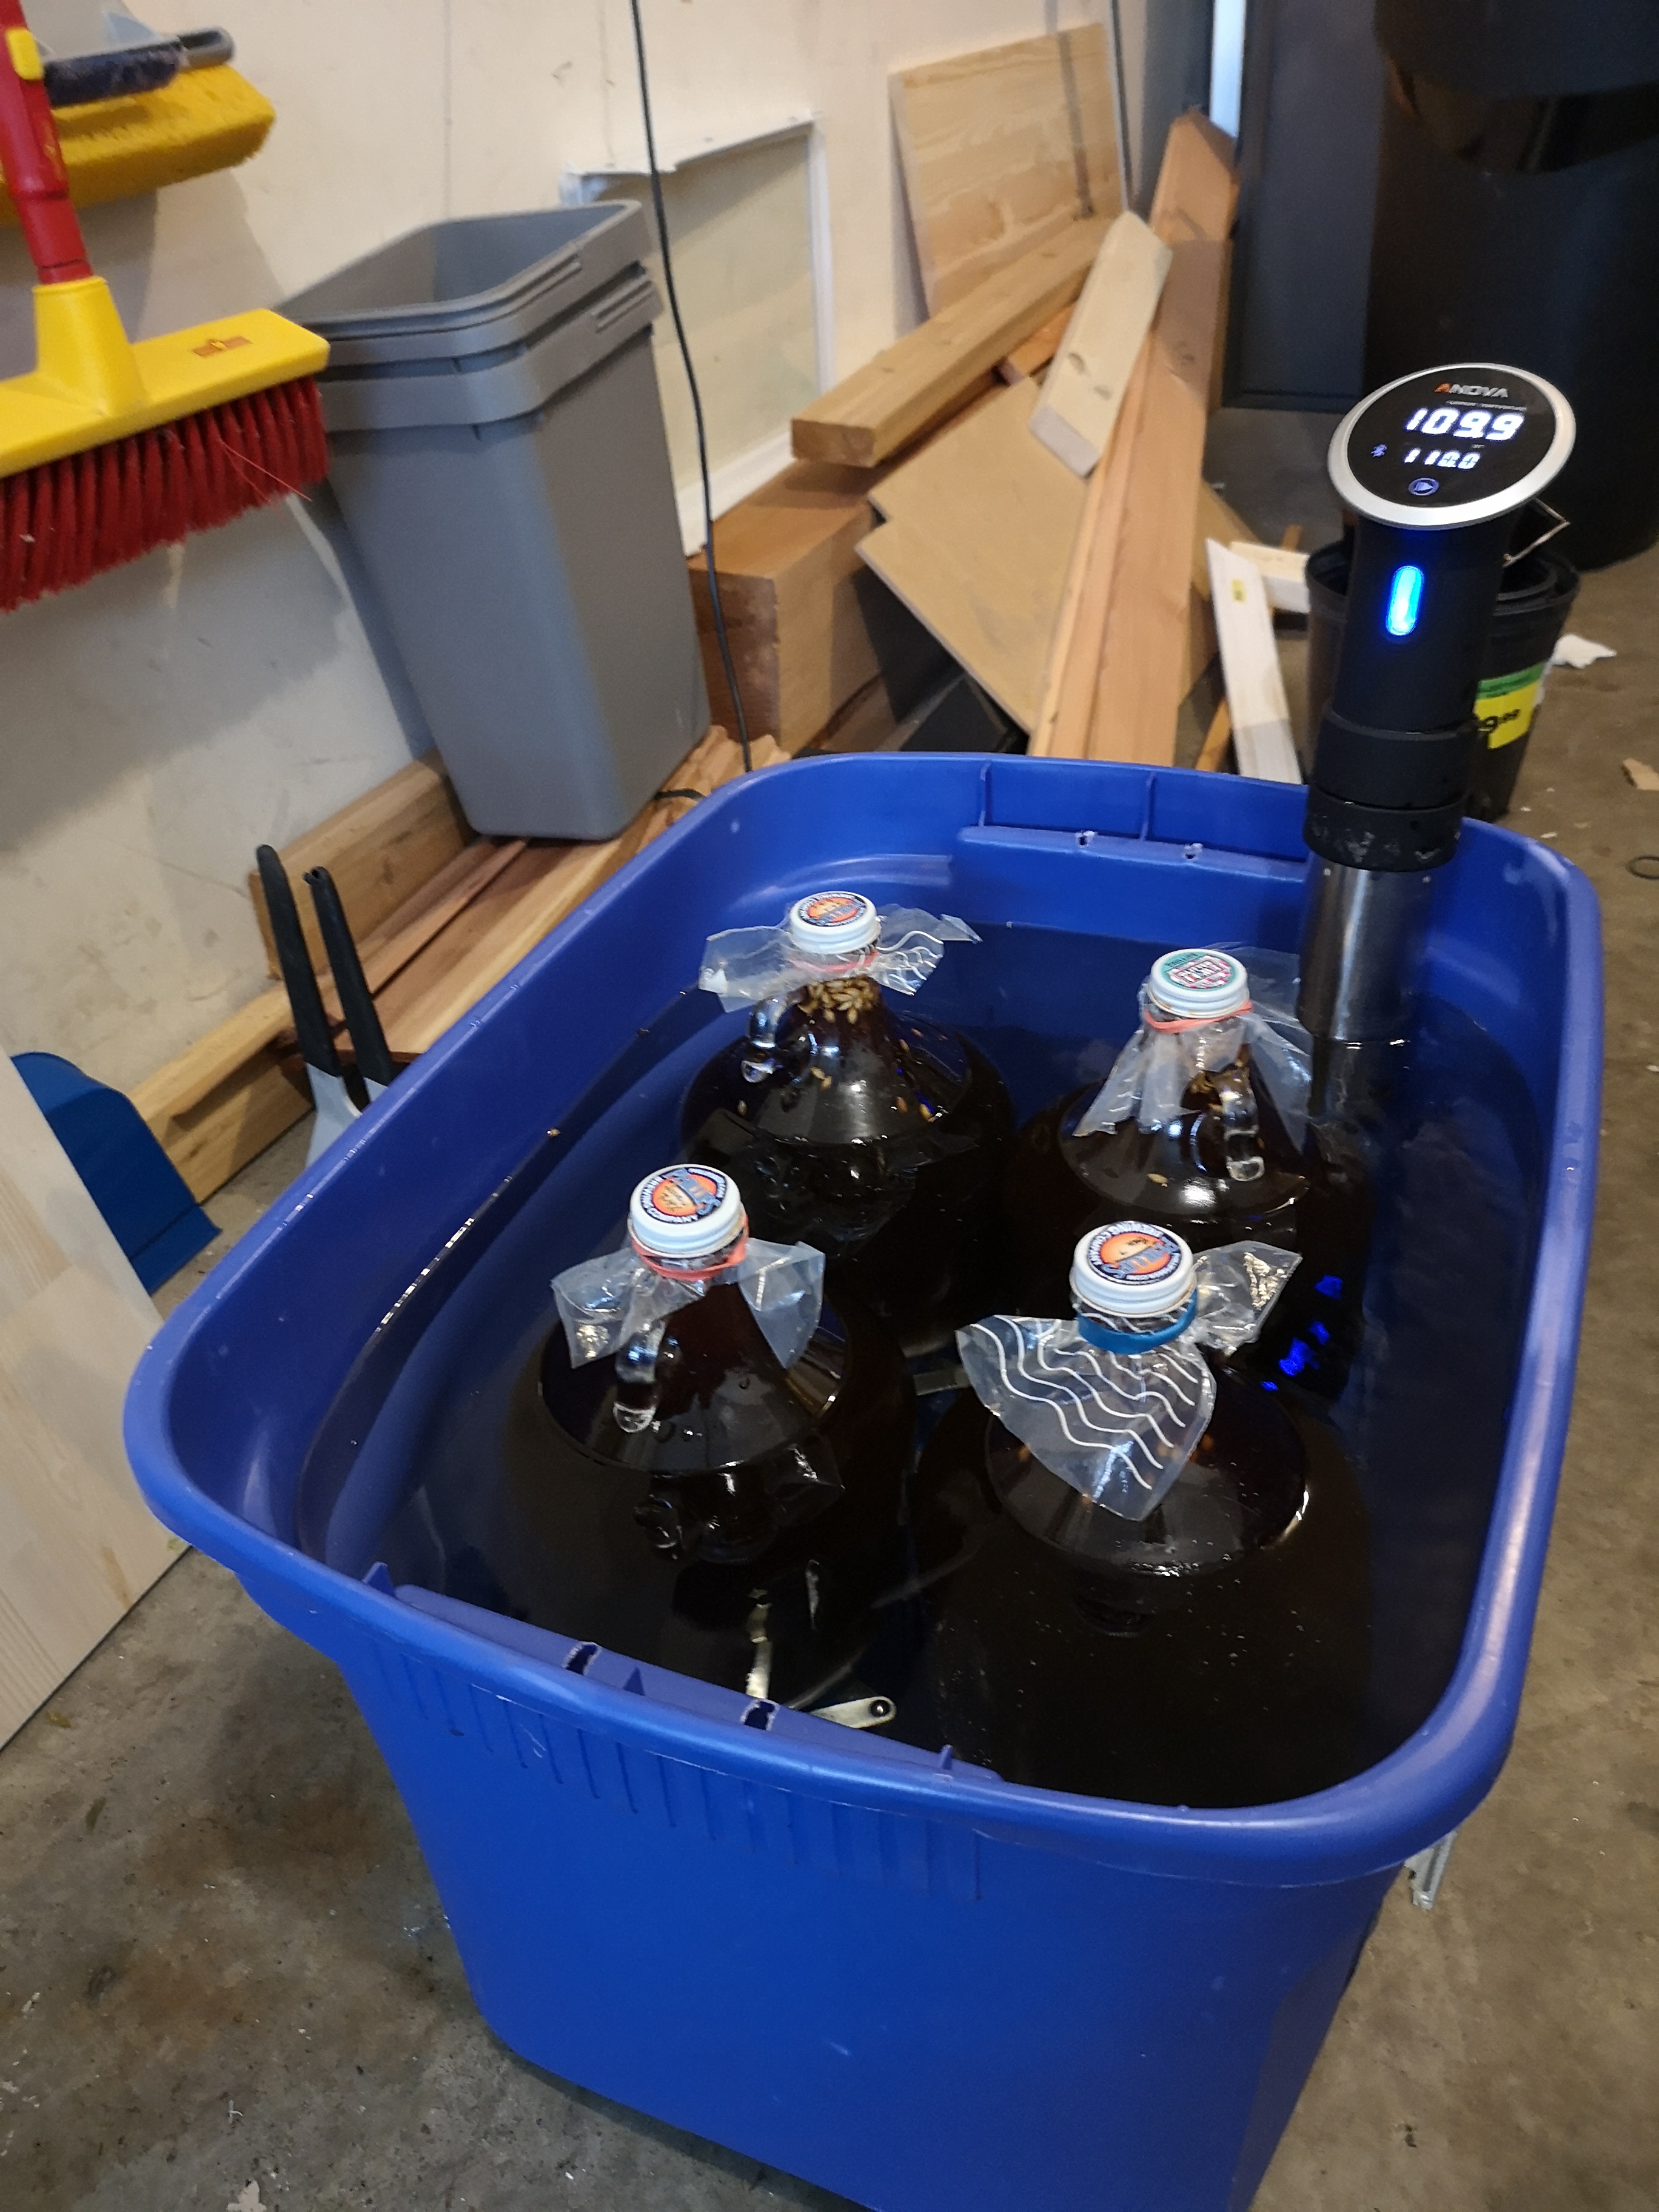
My trick is to use a sous vide wand. Sous vide stands means "under vacuum". The sous vide cooking wand provides the ideal opportunity to control both the temperature of our wart, and to keep it as far away from oxygen as possible. With sous vide, I replicate the environment of a pro-brewer's kettle, by putting my wort into glass demijohns, filled right to the brim and capped - no need for a CO2 flush, and fully sealed fermentor! I put a small amount of unpasturized grain in the wart to provide the base bacteria for growth. The demjohns are submerged into a water bath, with temperature maintained and precisely controlled by a sous vide wand.
The ideal temperature to encourage lactobacillus growth is around 46°C/115°F.
Sour flavours will develop over 24 hours, and continue to get stronger with time - my recipe uses roughly 36 hours for a nice laidback tart flavour. Sample every 12 hours or so, to achieve the sour levels you want.
Boil with a hop addition, and ferment with yeast as normal. Because you've grown your own sour bacterias, you no longer need a yeast mix containing lacto - you've already created it!
The Theory To Making A Good Sour
To make a sour beer is easy. Make sure some bacteria is left in your wort, and give it time. It'll go sour alright. To make a good sour, requires control of the temperature of the wort, control of the source of the baceria, as well as the wort's access to oxygen.
- Temperature Control is key to producing a nice sour flavour. The wrong temperature, either too hot, or too cold, will still promote bacteria growth, but of the kinds you don't want in your beer. Either undesireable flavours, or undesireable health consequences can occur due to the wrong bacteria. To get those nice lactobacillus I have found 115-120°F to work very well. The ideal temerpature is 117.5 F. I accidentally soured at 165 F once. Surprisingly, the beer was fine, but there was basically no sour at all.
- Limiting access to oxygen is arguably just as important as the souring temperature. If the wort is oxygen rich, or has an easy source of oxygen, the strains of lacto that are promoted result in a sour-bile (aka. vomit) flavour, and a beer that should be thrown away. If oxygen is not allowed near your beer during the souring stage, this won't happen.
- The source of the bacteria starter is also an important consideration. I have heard of success with use of milk or yogurt. I personally have had success with sour dough bread! For me the best source is the grains themselves. I use a small portion, roughly 30g per gallon, of unpasturized, unspent grains as the source of my sour bacteria. Use cracked grains so that the cores are exposed and can contaminate (in a good way!) your wort easily. Don't use the spent grains used in a mash, but rather entire fresh, dry grains.
Using fresh grains can be a bit risky, as you never truly know what's growing on them. On occassion, I have had beers fail because of this. But I have had a 100% success rate (that's right, 100%!) over many sour batches, when using pilsen/pilsner grains. This was true when I lived in Belfast, as much as it is true now in Victoria. I almost unanimously use pilsen grains for souring. Others can be used, but your mileage may vary.
The Equipment Needed
- A sous vide wand.
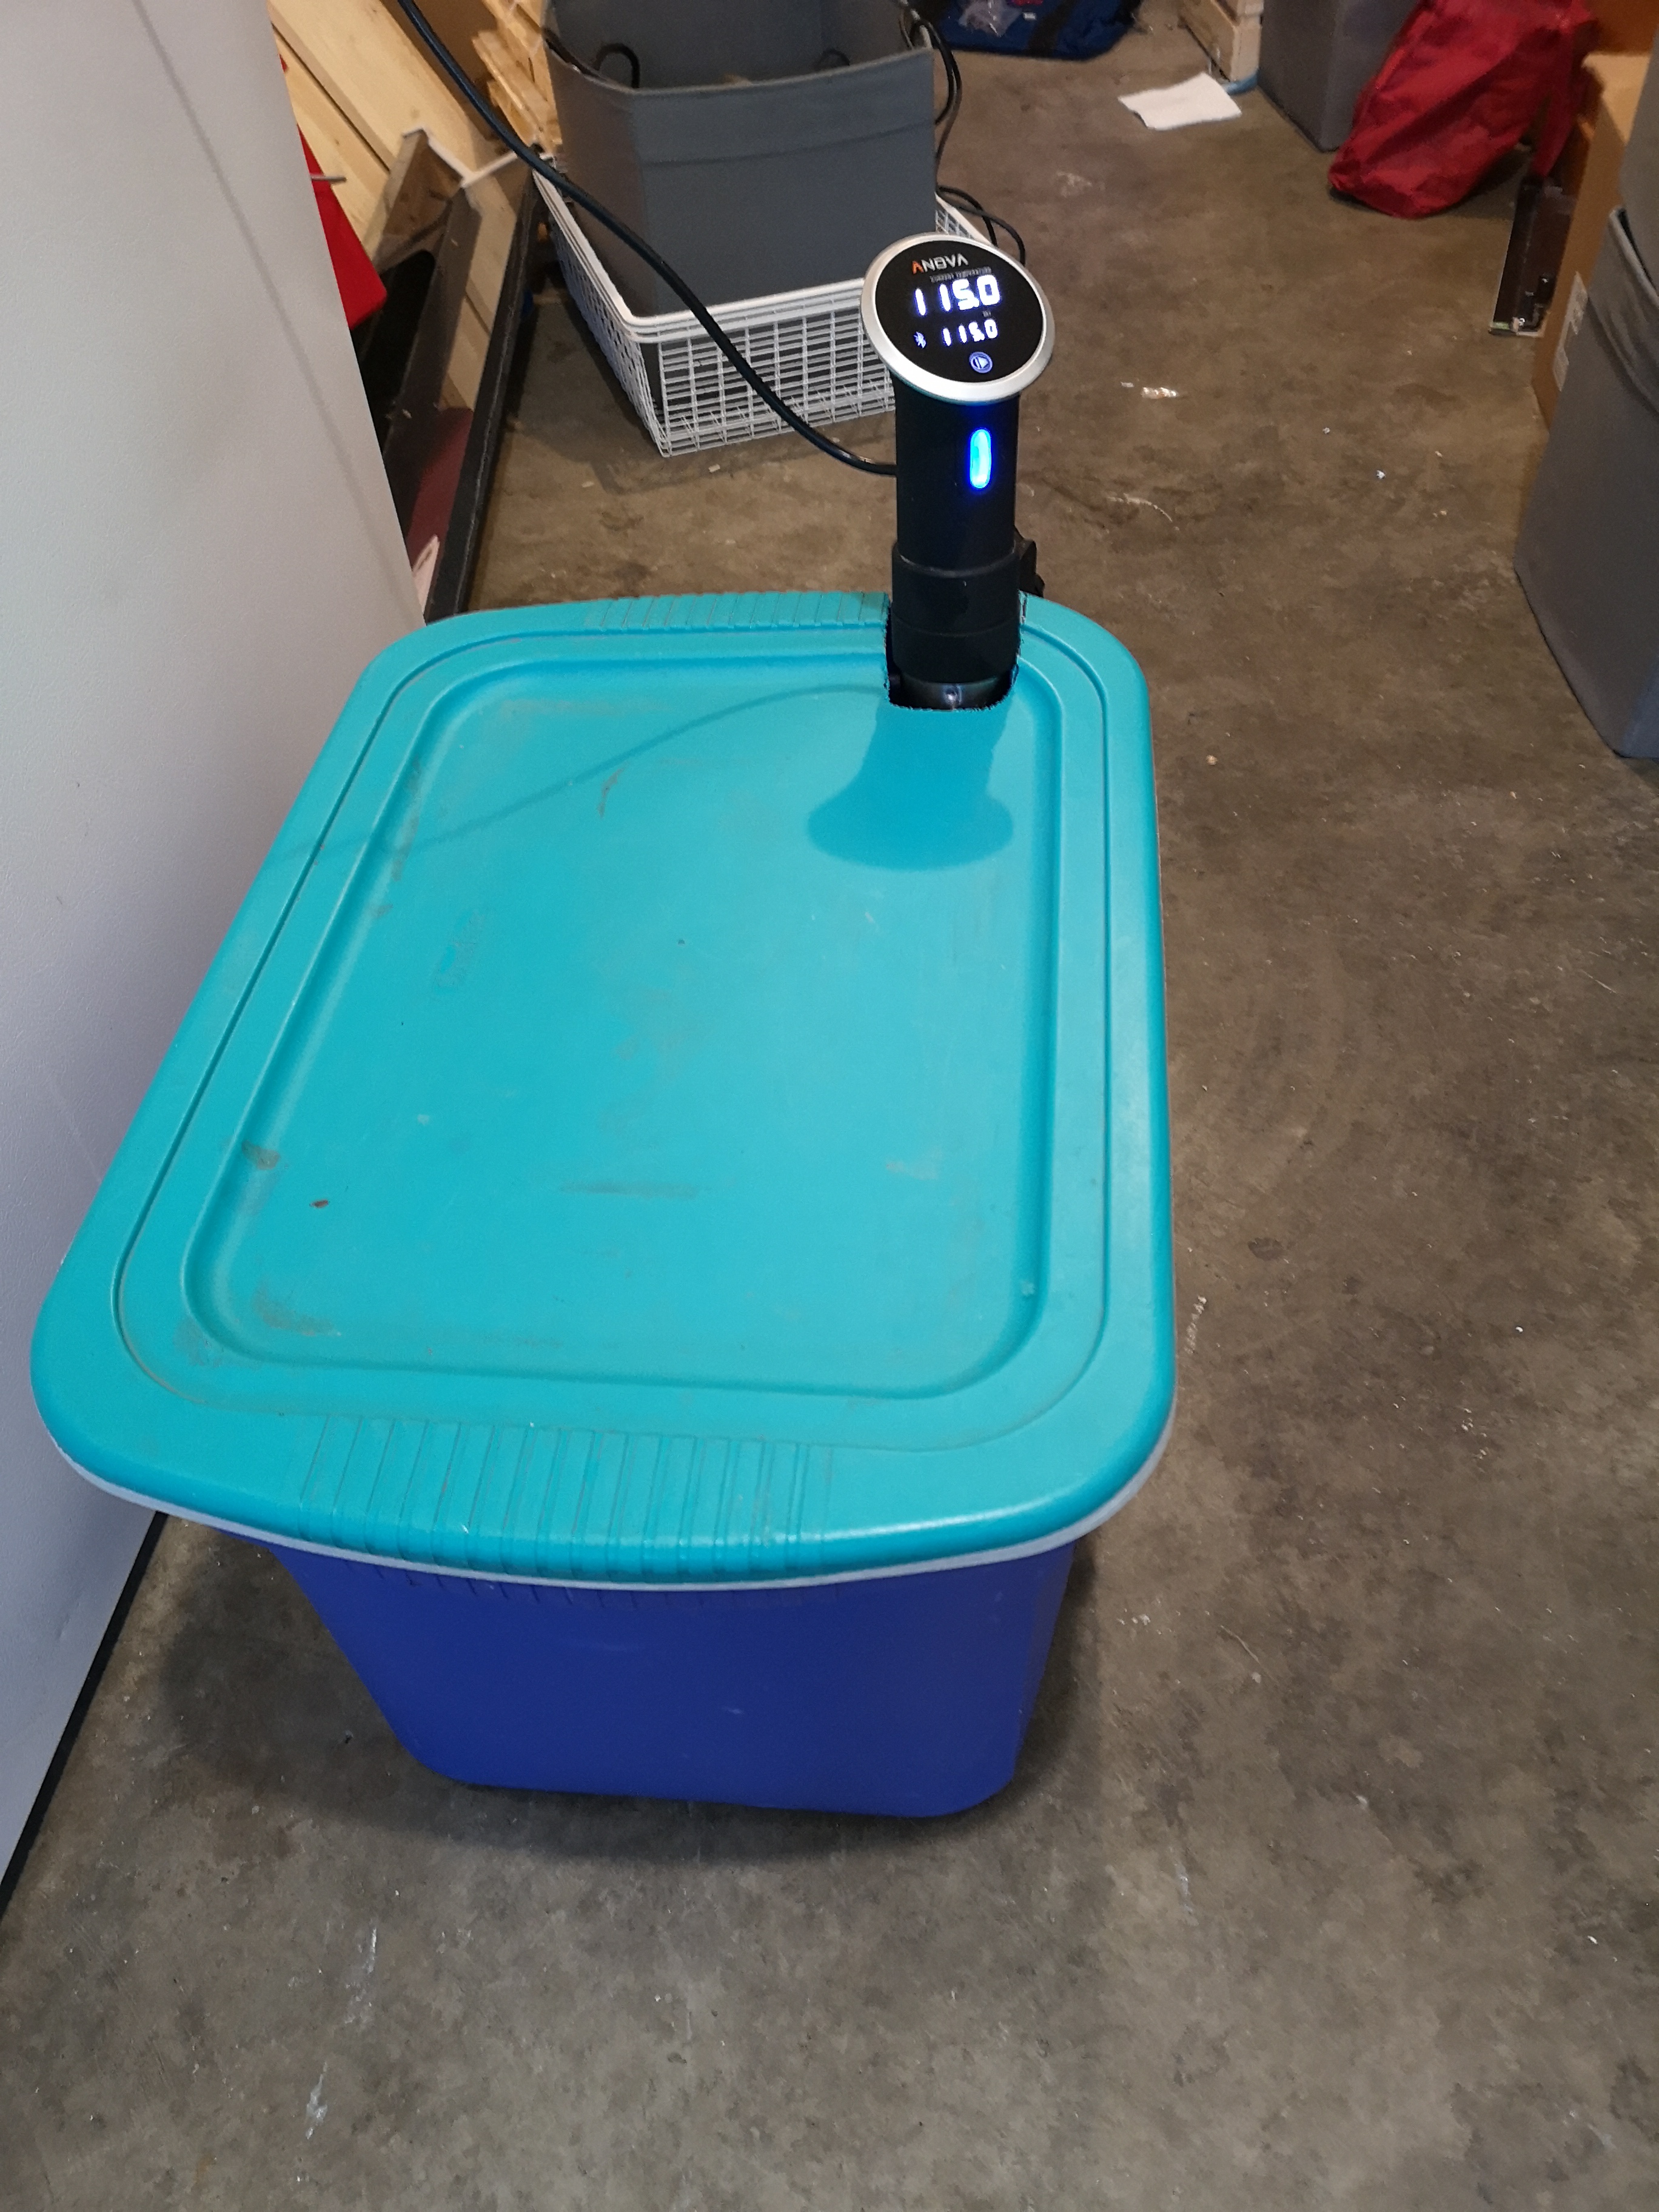
- A big tub.
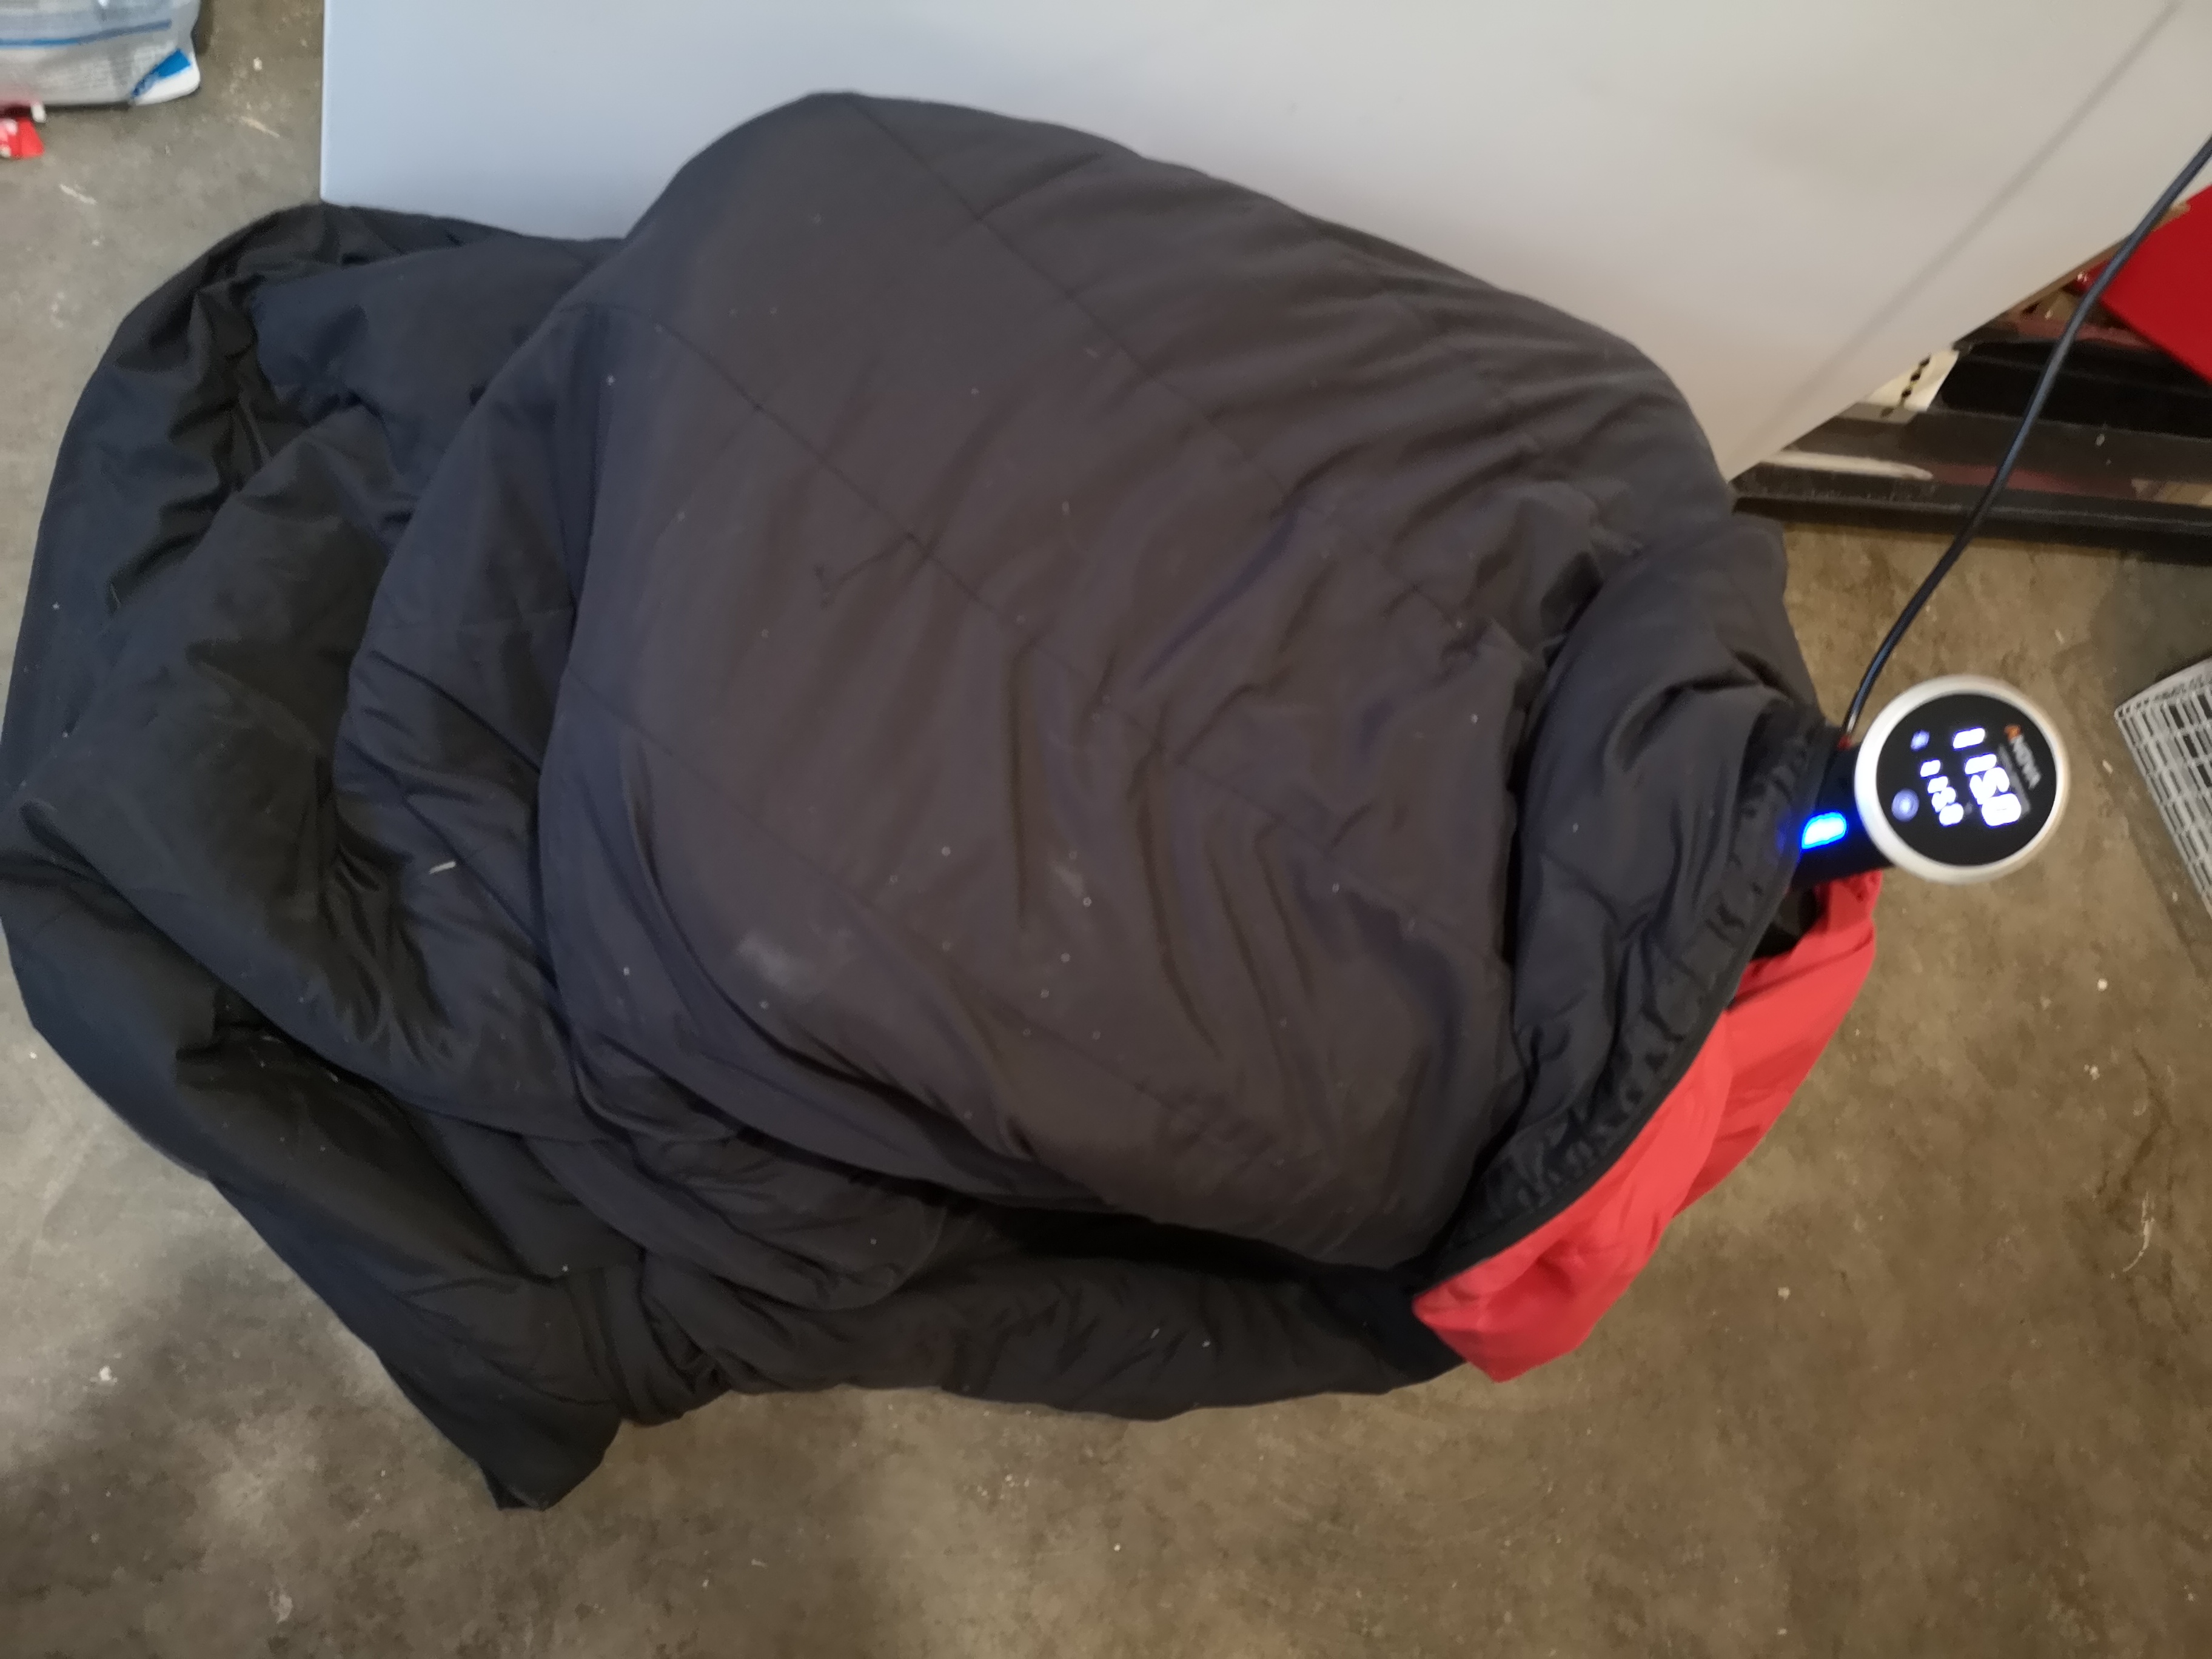
- Optional: some sort of insulation.
The important aspects of a choice in sous vide wand is accurate temperature control, and water volume. I like the wands from Anova because they control temperatures to 0.5°F (1°F would be fine), and can easily handle a water volume sufficient for a 4-5 gallon batch. Plus they aren't too expensive.
I use a simple rubbermaid bin for the water bath. The lid has a small cut-out to fit relatively tightly around the wand. I suspend the demijohns in the water by placing them on some wire racks. This is less for submersion, and more to balance the water level for sufficient depth of the wand, while keeping the openings of the demijohns above the water level.
I also wrap my tub in a thick sleeping bag. This helps prevent unnecessary heat loss. If you are using a cooler, this obviously isn't necessary.
Pro-tip: tape the lid down to help seal in the water vapour. This really helps energy and temperature loss!
The How-To
The steps are pretty straight forward, with the only real difference between normal brewing and soured brewing being the souring stage. My steps are:
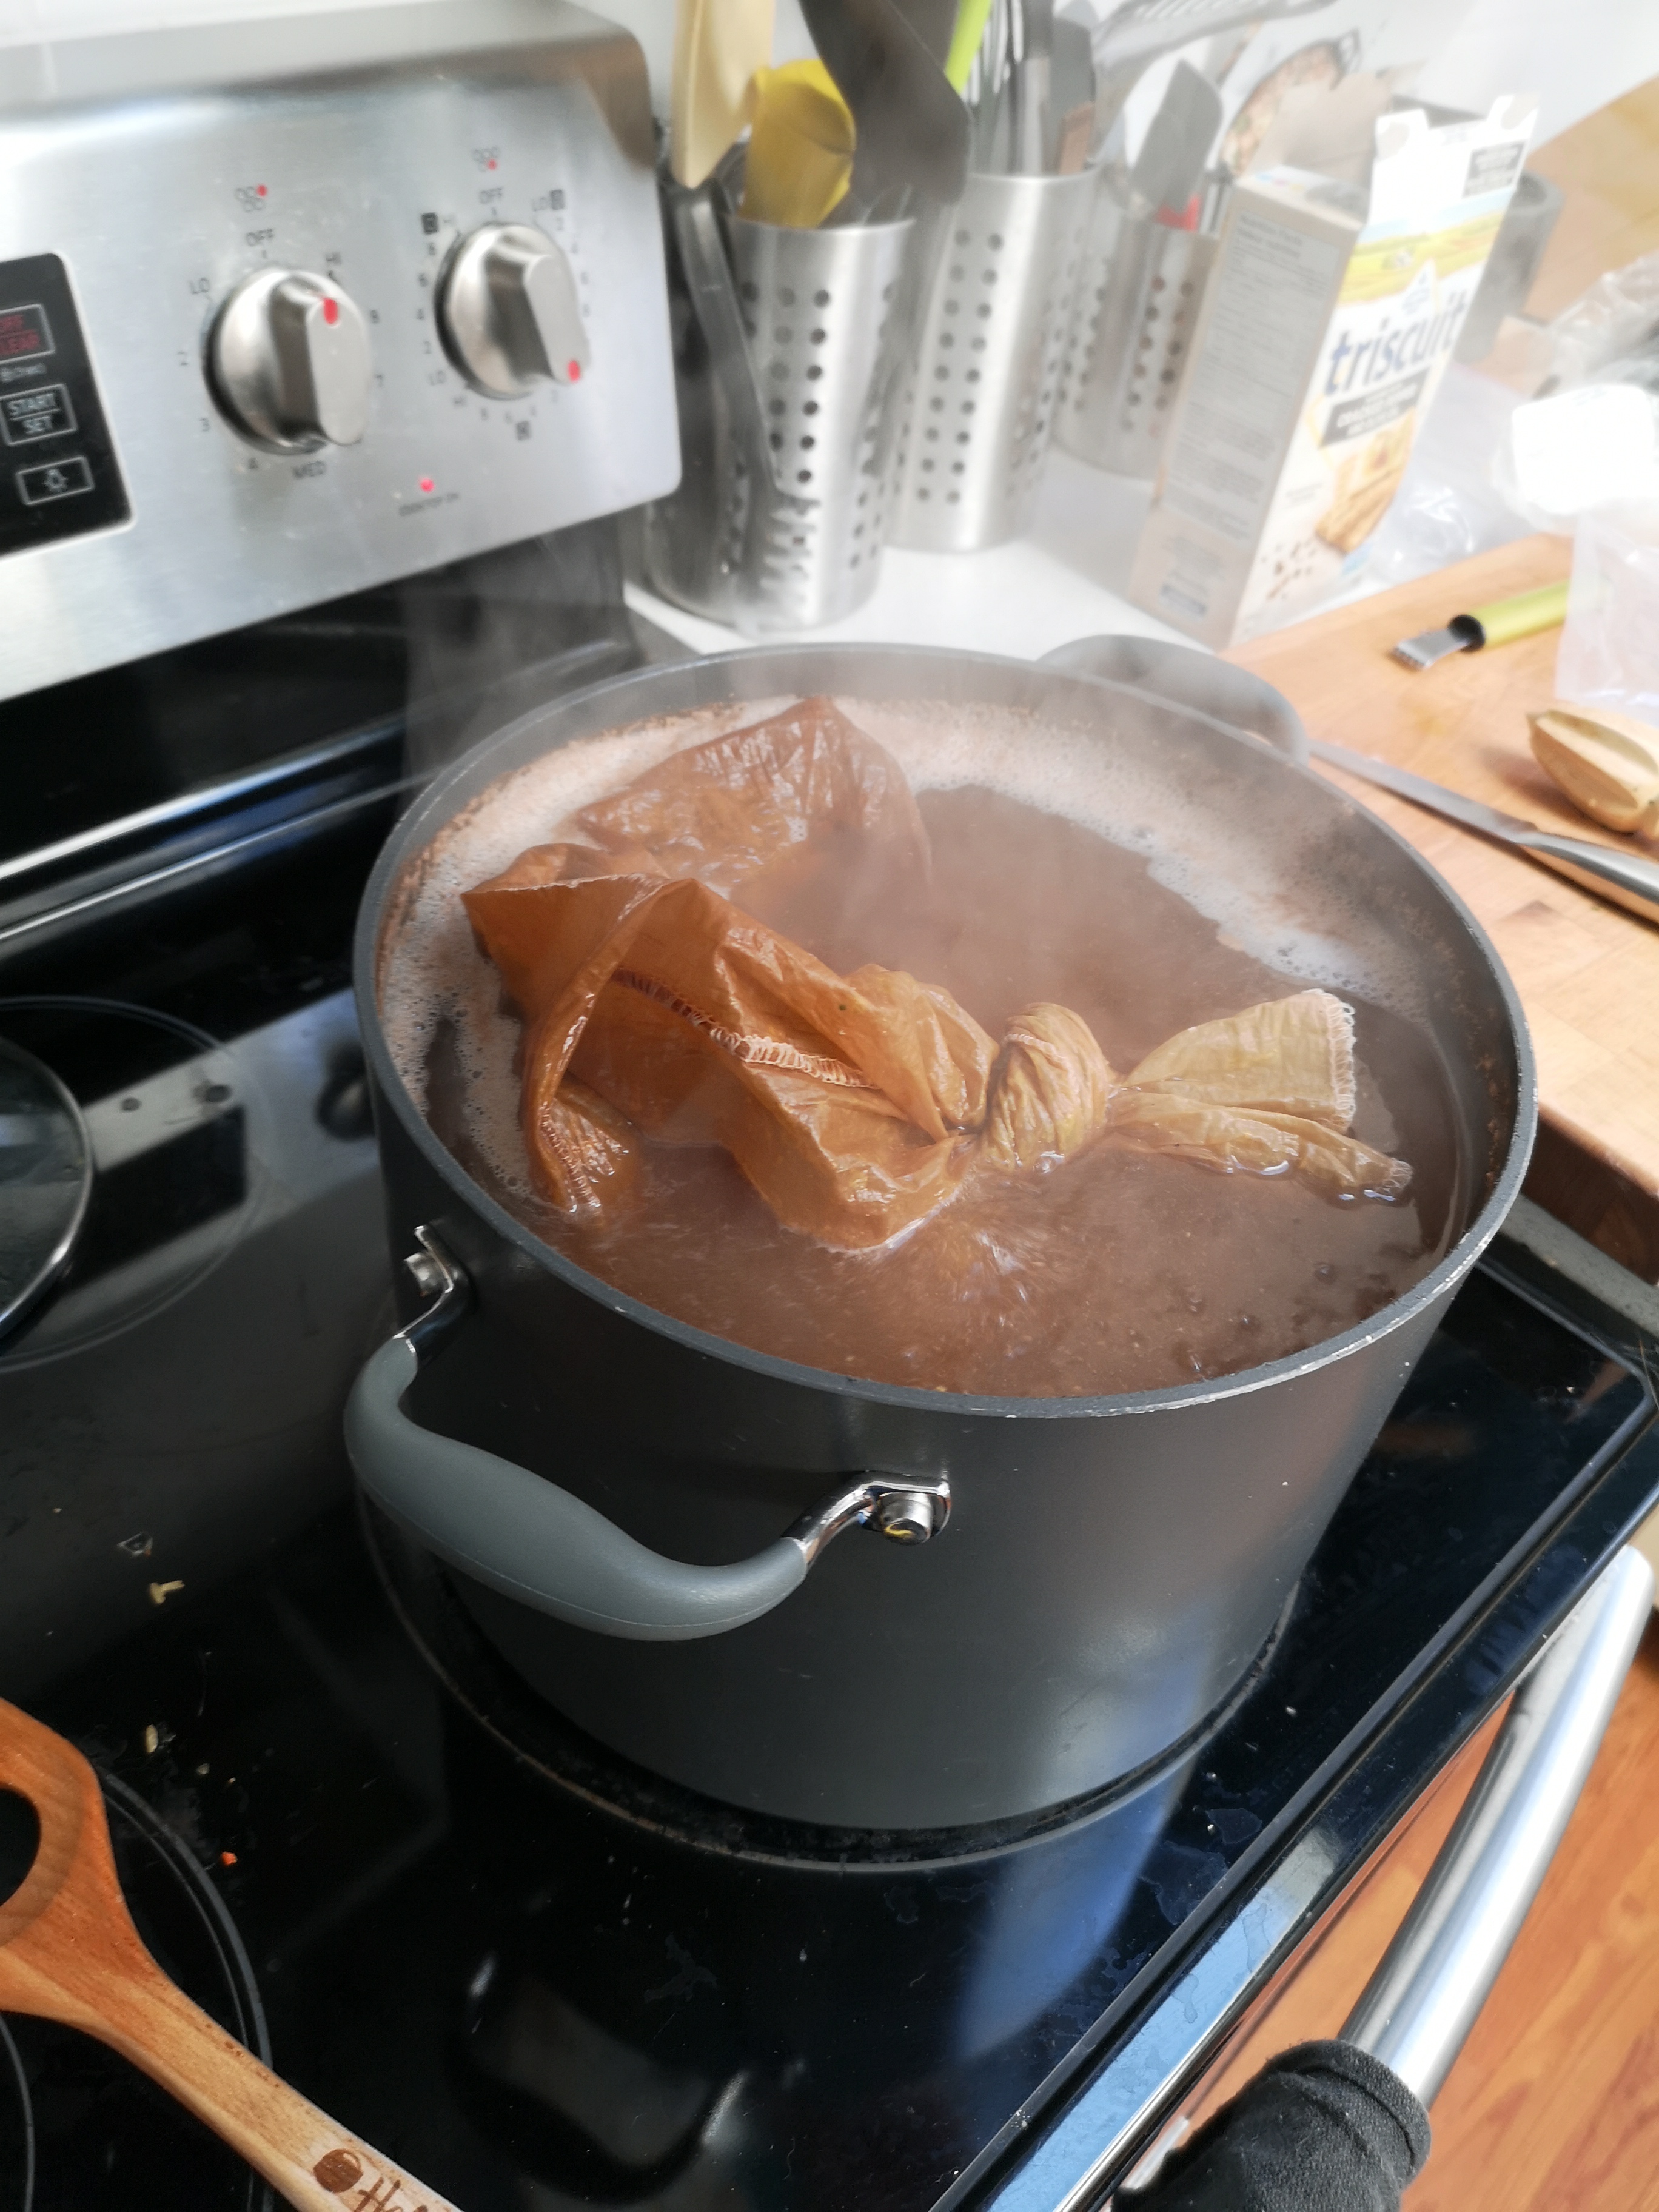
- Mash as per usual. I personally use a brew-in-a-bag (BIAB) method.
- Optional: short ~5 minute pasturization.
- Sour the mash.
- Hop additions in the boil.
- Ferment
When mashing, the goal is to provide a nice sugary environment for the baceria to grow in. For that reason, I always do a full mash, including all of my fermentables right away.
Something worth considering is a high concentration mash. This can be useful if your sous vide water bath capacity is small. I do 4 gallon batches, and have a container and wand big enough to handle it all. If yours happens to be less powerful, mash in half the water volume, and add the water back in during the boil. This will result in a lower efficiency, but will still give you bigger volumes at the end.
The optional pasturization is only necessary when you happen to be using unfamiliar grains. The idea is to kill of any unwanted bacteria that can ruin the beer. I have a killer good flemish red that always fails without this short pasturization. My wheat or pilsen-based beers don't need this. There is no harm in pasturizing, other than the souring stage might take a little longer. So if you're not certain, boil that wart for five minutes.
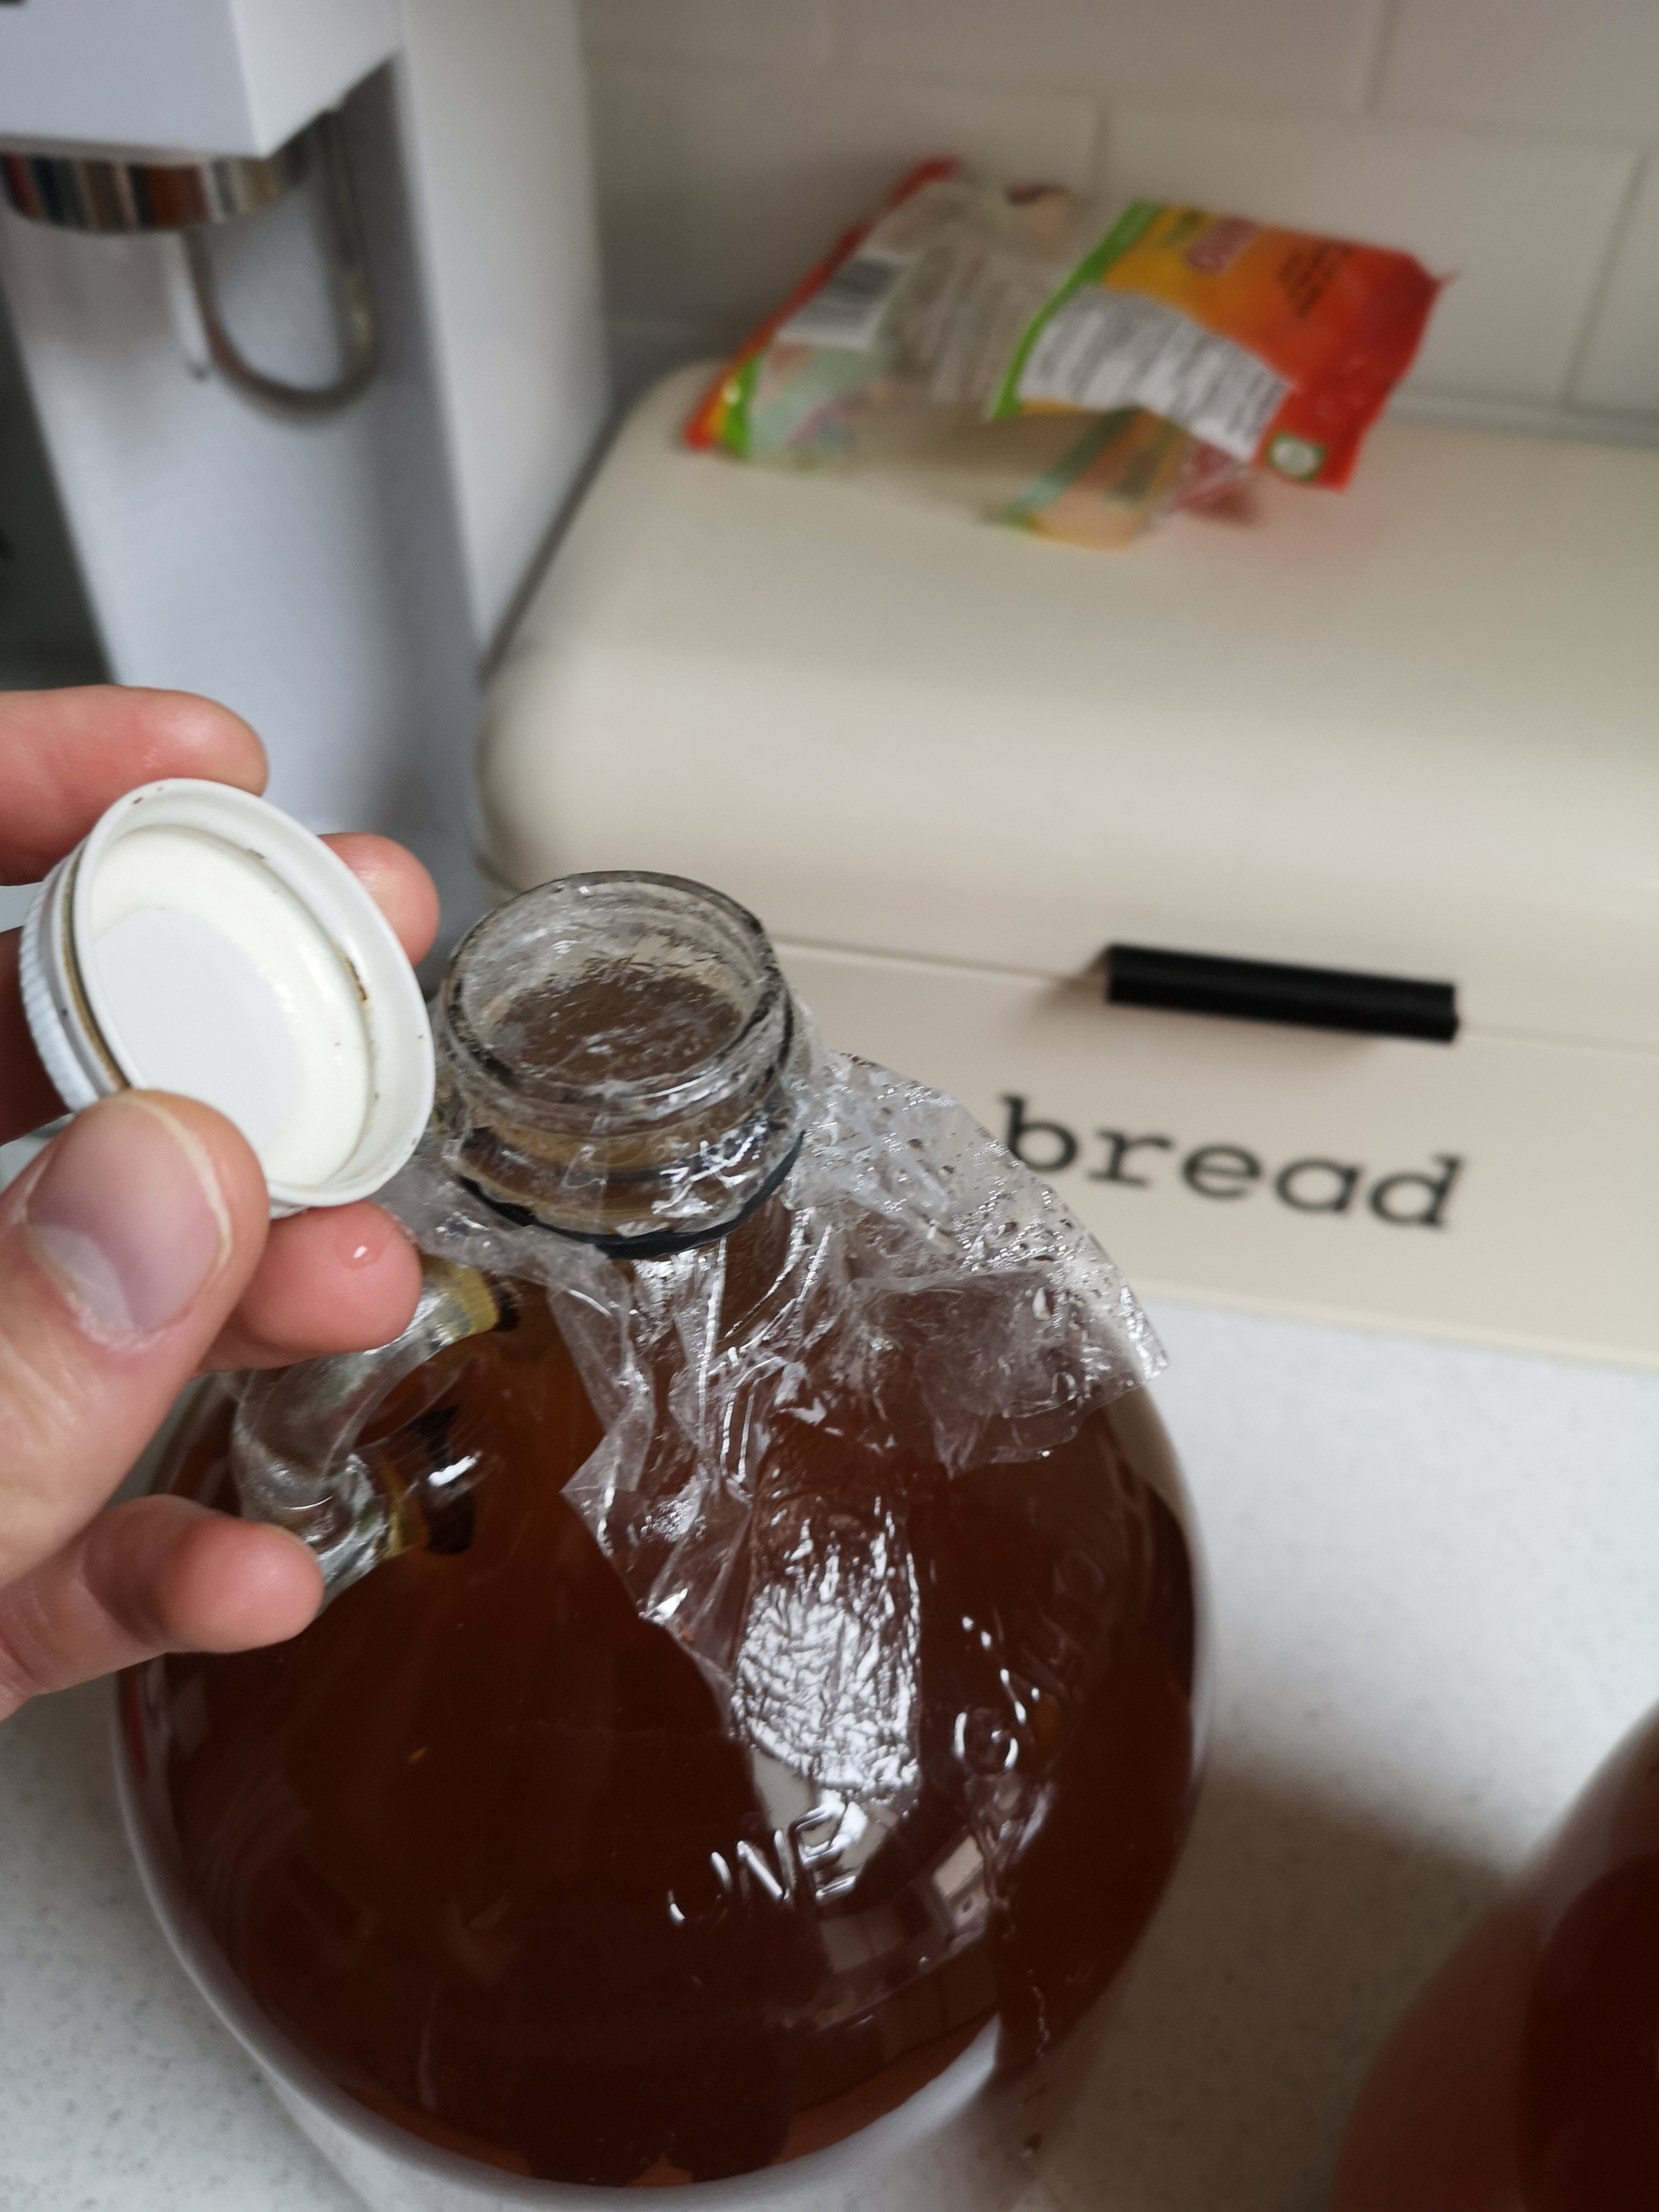
For souring, I measure out 30 g of cracked pilsen grains (can use others though, see above) and put in each of my 1 gallon demijohns. Exactly 30 g is not critical, it's just a value that has worked for me. On top of that I pour my wort. I cap each demijohn with plastic wrap (saran wrap) held down by an elastic over the neck of the demijohn. The plastic is useful to avoid seepage that can occur as the temperature inside the glass containers equalizes. If you have demijohns with threaded necks, consider using a growler lid, loosely fitted over the plastic, just to help avoid tears. Warning: don't put those lids on tight. I blew up a demijohn once because the pressure dropped far as the wart cooled in the demojohn...
The demijohns are submerged in the sous vide bath, and maintained at 115°F. I have soured for as long as 3 full days without any bad flavours appearing. Just as long as oxygen isn't allowed in, it should all be fine.
Do not full submerge the demijohns. Keep their necks above the bath water level!
I recommend checking the sourness every 12 hours or so. I use taste as a measure of sourness. Aternatively, you could us pH value to directly measure acidity (higher acidity is higher sour flavour), but pH doesn't consider the inherent sweetness left over after fermenting. I find that my tongue provides a better measure of gauging if the wort is sour enough. One of the very rare circumstances where I prefer the art over the science. Warning: make sure to properly sanitize your sampling tool. The wort is warm and sugary, a perfect place to grow unwanted bacteria. Sanitize!
The last step involved is a simple strain of the wort when transferring to the kettle for the boil. I use a large metal strainer to catch the loose grain that we used for a lacto source. One could use a grain or hop bag to keep it all contained, but in my experience, that only results in a BIG mess.
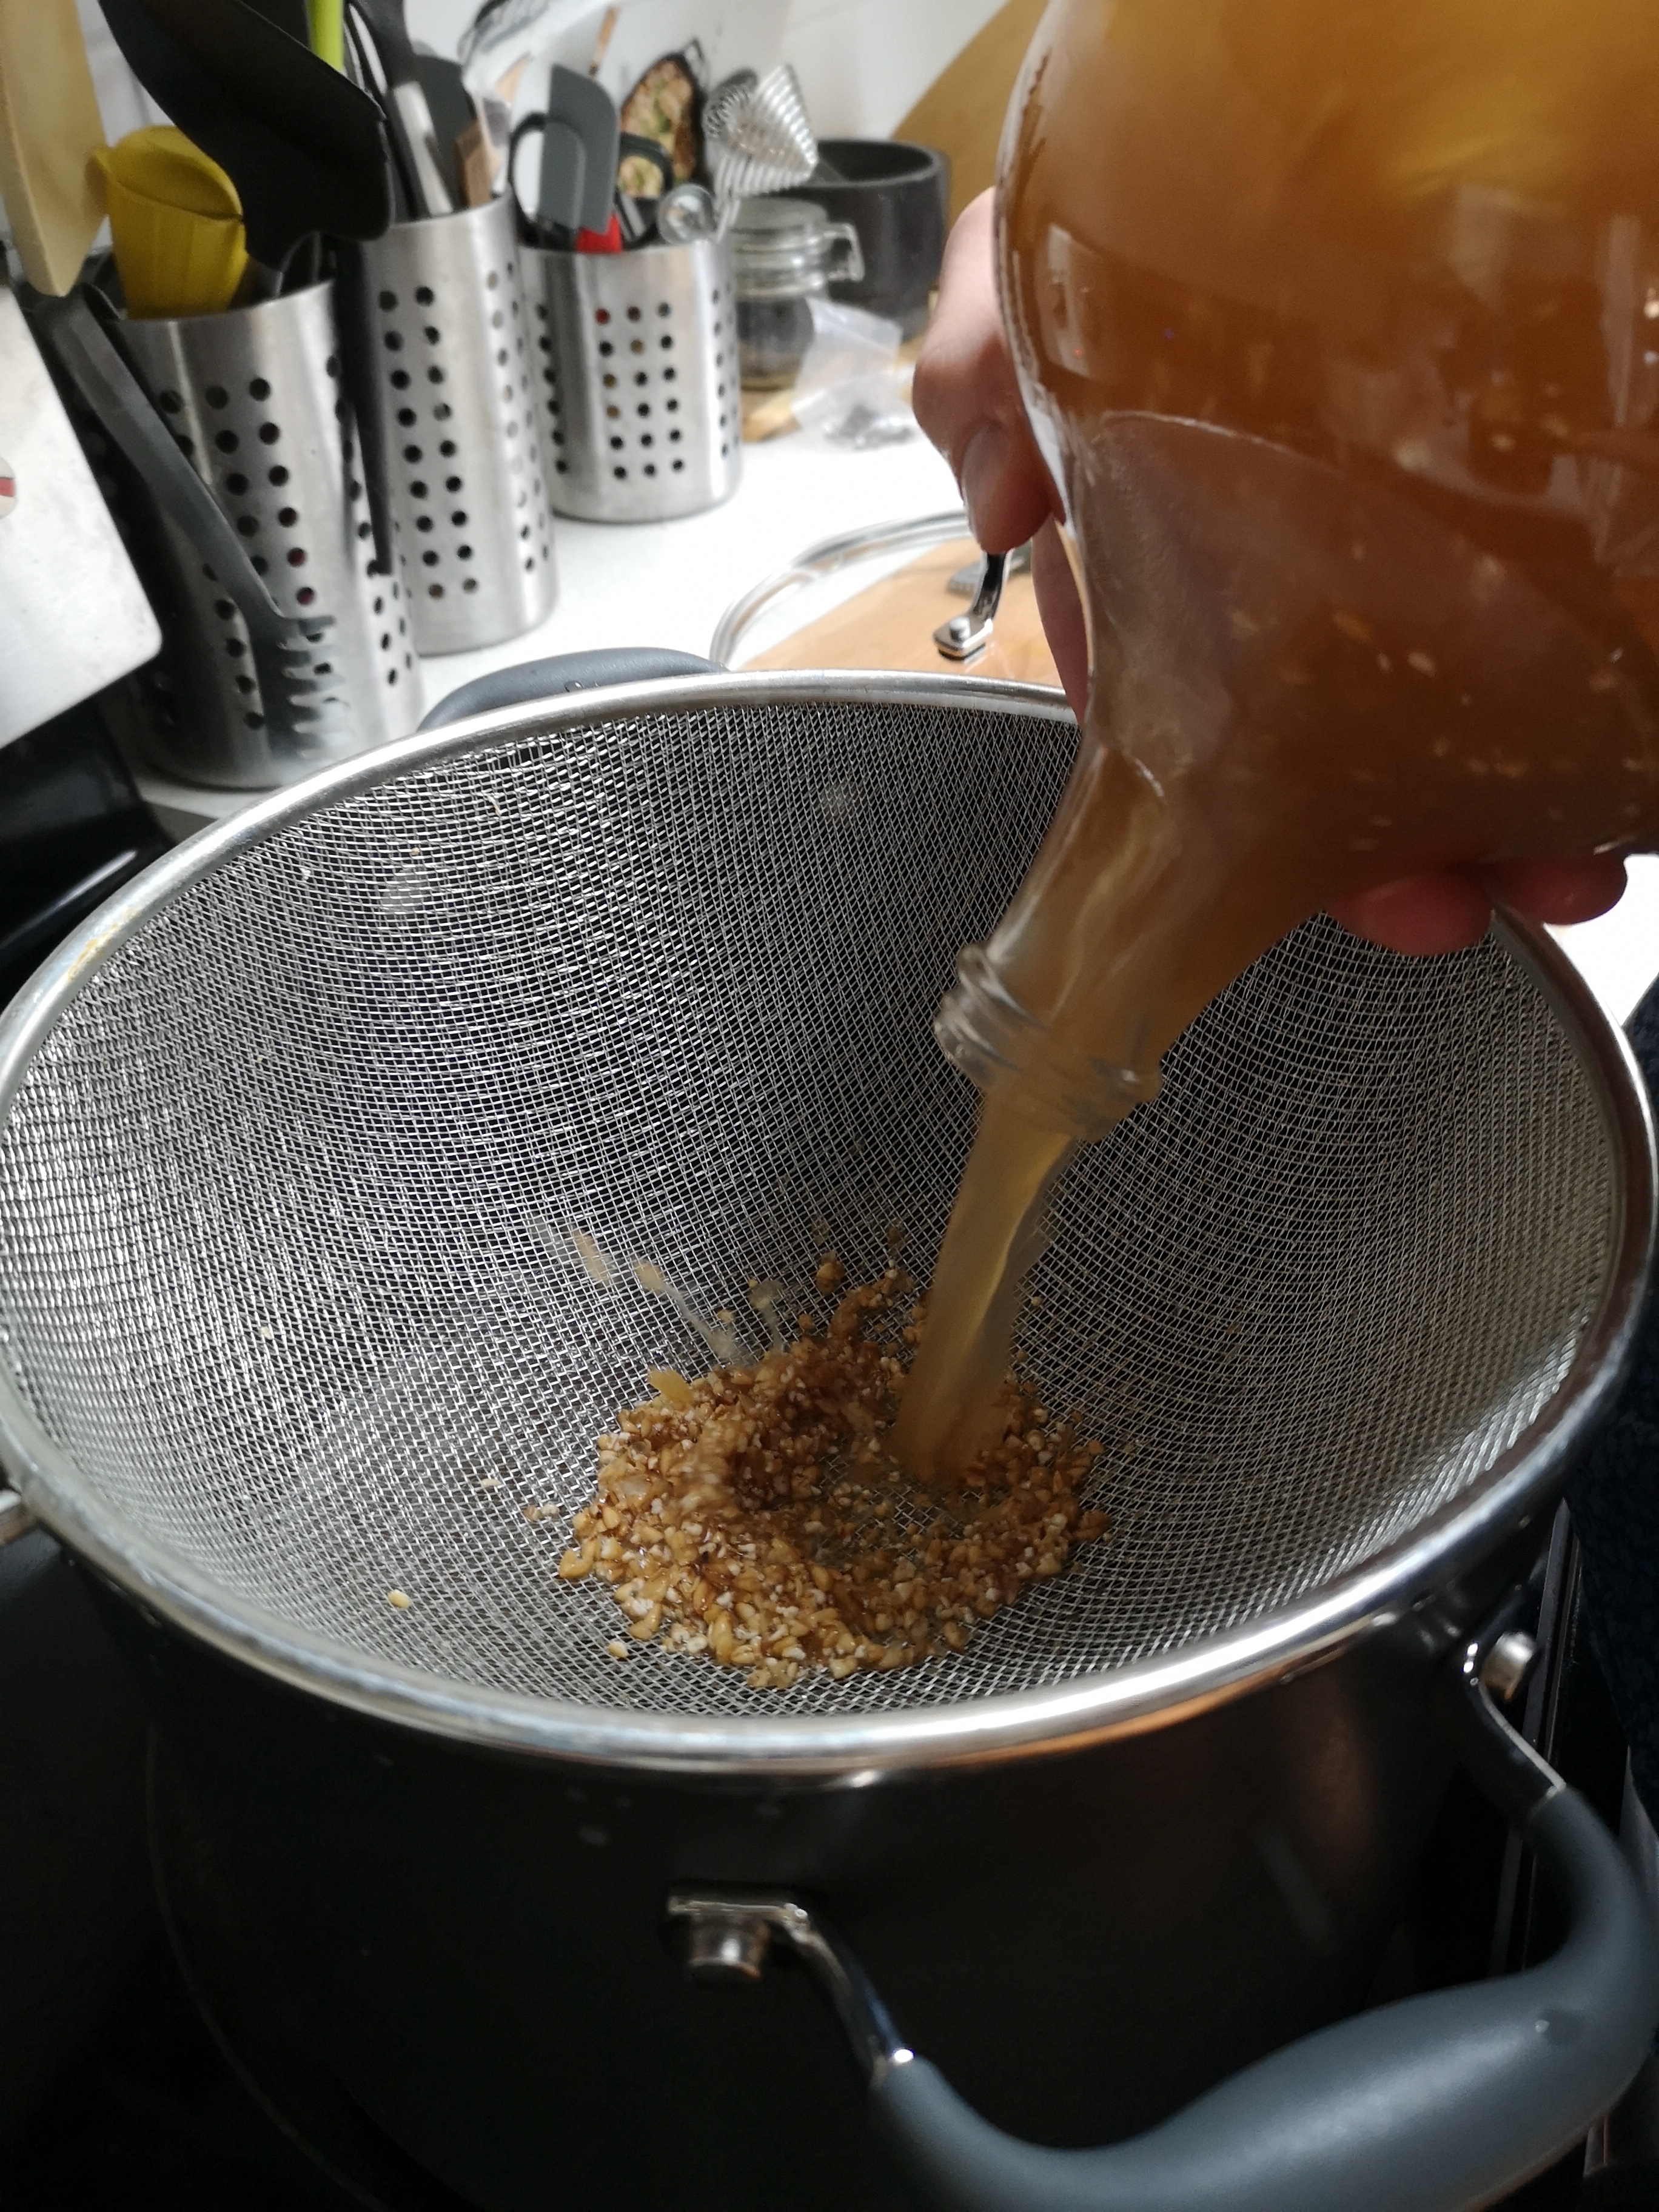
If everything went well, when you pour out the wort into yout kettle, you should be presented with a scent that I can only describe as sickly-sweet. It's like the sweet wort smell you are used to, tinged with a sour smell. If you smell bile, mold, rot, or anything along those lines, chances are your wort has tarnished, and you'll need to start again. I found it very difficult the first few times to differentiate between the good sour smell, and the bad sour smell. Practice makes perfect.
From here it's business as usual. Make sure to boil the wort for at least ten minutes, just to ensure the lacto culture you've so loving cared for, is fully killed off. Otherwise the beer will continue to sour with time. If this is something you're looking for, better to use a yeast blend that contains lacto (eg. the lactobacillus blend from Escarpment Labs), as the balance with the yeast has been carefully thought out. Otherwise, the chances are, your home grown lacto will either over power, or be overpowered, by the yeast you pitch, and the result can be quite odd tasting.
A Special Note About Sanitization
The most important part of beer making is sanitization. Sour beers make this all the more important. Be very very diligent in cleaning your gear after brewing a sour beer. It's very easy for a small amount of that lacto to remain behind and ruin future non-sour batches. VERY easy. Speaking from experience...
I sanitize my gear before and after every use. That is, Starsan my demijohns, carboys, racking cane, tubes, hop and grain bags, etc. Sanitization before and after is the only way I keep my bacteria under control.
Some people prefer to have equipment used solely for sour beers. That way sanitization isn't as totally critical. I personally don't have the funds (or garage space) to keep two sets of everything.
A Simple Berliner Weiss Recipe
This is a wheat-forward recipe of mine, that I lovingly call the Berliner-Wes. Har. It's a very good place to start your souring adventures. It's hard to mess up. Classical berliners usually contain more pilsen than wheat. I have found however, a very lovely balance of the sweetness of wheat to counter the sour, and make a sour beer that isn't too sour (all to common in the modern beer scene).
The recipe is for 1 gallon/4.5 litres. Scale up to the volume you wish to brew. I recommend starting small (1-2 gal), as it is easiest to deal with while getting used to sous vide.
You might be shocked to see that this is a partial mash. The majority fermentable ingredient is wheat dry malt extract (DME)! Because this is a sour forward beer, the subtle improvement in flavour that is gained from use of full grain mash is entirely lost. Use pilsen grains, and wheat DME. Trust me.
Fermentables
- 0.31 kg Pilsner grain
- 0.3 kg wheat DME (specific style doesn't matter much)
Hops
- 3.5 g Amarillo (15 minute boil)
Yeast
- Safale American Ale Yeast US-05. Half of a dry pack is sufficient for 1 gal volume. Note: any basic ale yeast will do.
Mash at 160 F for 1 hour. I usually at the DME about 10 minutes before the end of mashing. I mash brew-in-a-bag with mash volume of 4.5 litres. The DME will add ~0.5 litres, and very little volume will be lost to grains.
Transfer to a sanitized demijohn (or more than one if doing high volumes), and top up to the brim with freshly boiled water.
As mentioned above, cover the demijohn with a small amount of sanitized (!) clear plastic, held down with a sanitized (!) elastic. Sous vide at 115°F for 36+ hours or until your preferred sour level is reached.
Hops addition is really small, but adds an important flavour. A 15 minute boil is entirely sufficient.
Pitch yeast as normal. Ferment, bottle, enjoy!